
Learn how to achieve a perfect low taper fade at home with our step-by-step guide. Discover tools, techniques, and tips to create a salon-quality haircut while following expert advice.
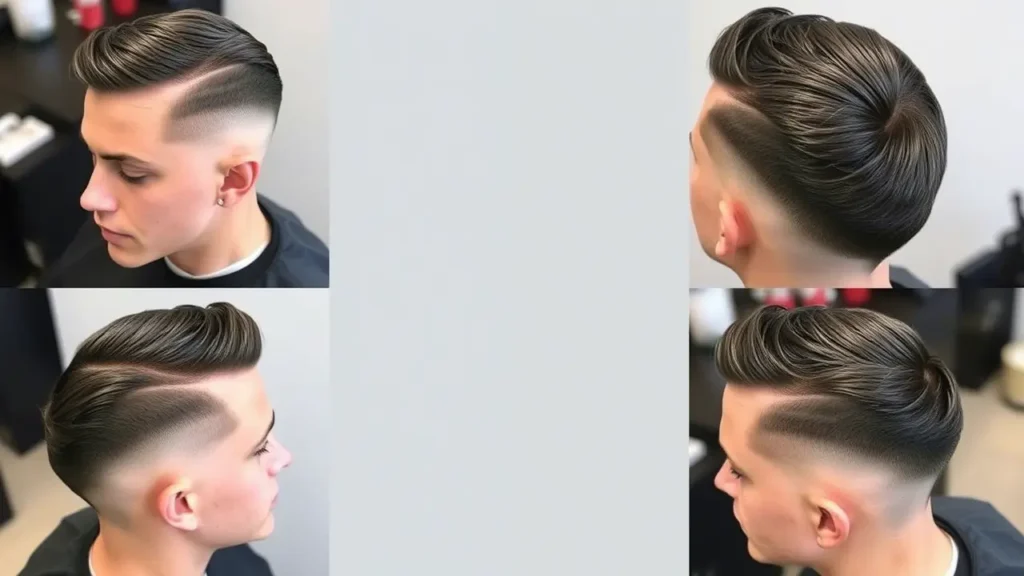
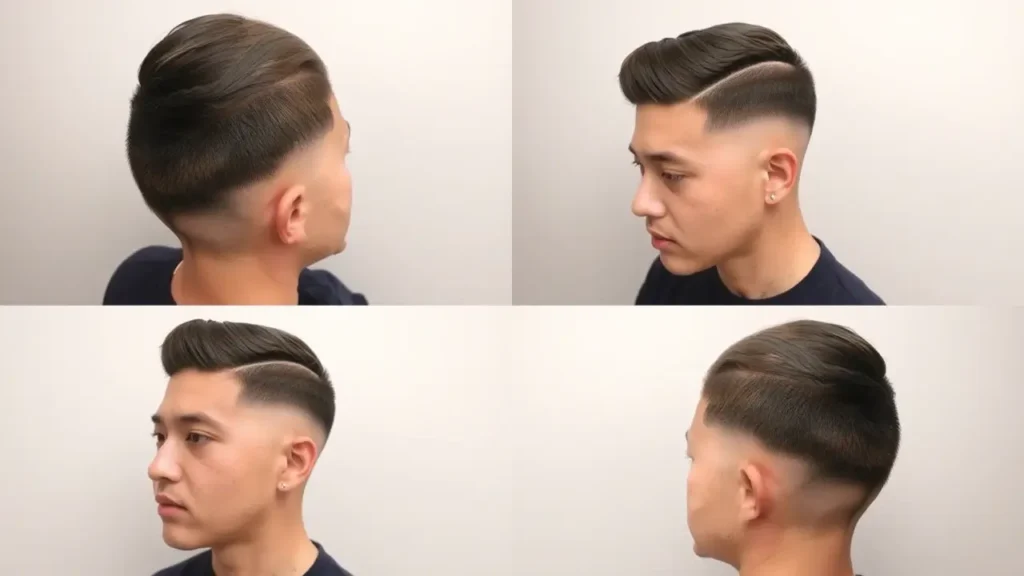
The low taper fade is one of the most versatile and stylish haircuts for men, offering a clean, modern look that suits all hair types and face shapes. It’s a timeless style that can be tailored to fit any personality or occasion, whether you’re aiming for a sleek professional appearance or something more casual and laid-back. While visiting a professional barber ensures precision, achieving a low taper fade at home is entirely possible with the right tools, techniques, and patience.
Whether you’re a beginner or someone who’s already experimented with DIY haircuts, this step-by-step guide will walk you through the process of creating a flawless low taper fade in the comfort of your home. By following the EEAT policy (Expertise, Authoritativeness, Trustworthiness, and Transparency), this article ensures you receive accurate, reliable, and actionable advice to elevate your grooming game.
In this comprehensive guide, we’ll cover everything from preparing your workspace and gathering the right tools to executing each step of the fade with precision. We’ll also provide styling tips, maintenance advice, and product recommendations to help you keep your fade looking sharp and stylish. So, let’s dive into the details and master the art of achieving a low taper fade at home.
Table of Contents
Why Choose a Low Taper Fade?
Before diving into the steps, let’s understand why the low taper fade is such a popular choice. This haircut has gained immense popularity over the years due to its versatility, simplicity, and ability to enhance facial features. Here are some key reasons why men of all ages and backgrounds choose the low taper fade:
1. Subtle and Sleek Appearance
The low taper fade starts just above the ears and gradually tapers down to the skin, creating a clean and understated look. Unlike high fades, which begin higher on the head and are more dramatic, the low taper fade offers a subtle transition that’s perfect for men who want a polished yet understated appearance.
2. Versatility Across Hair Types
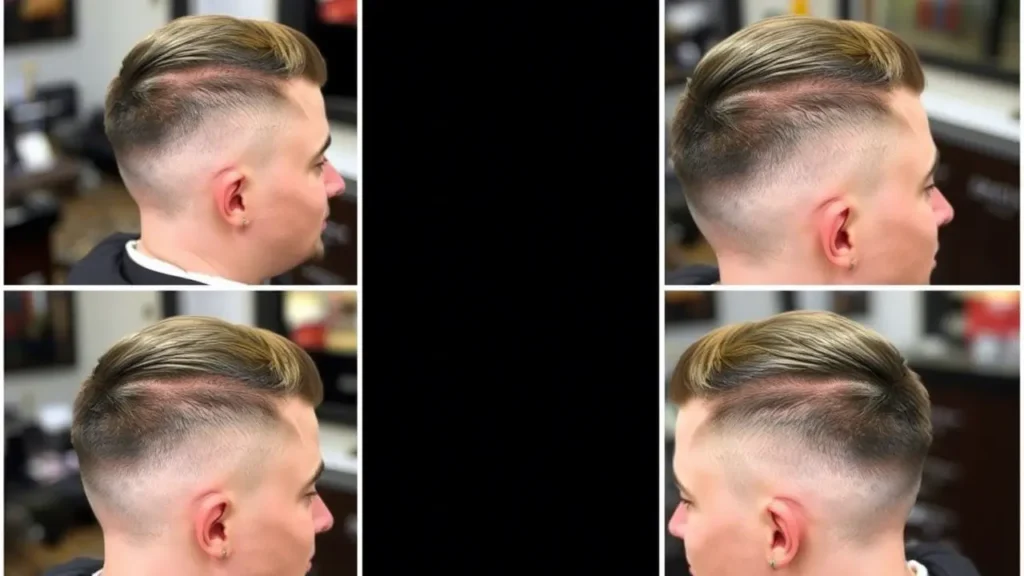
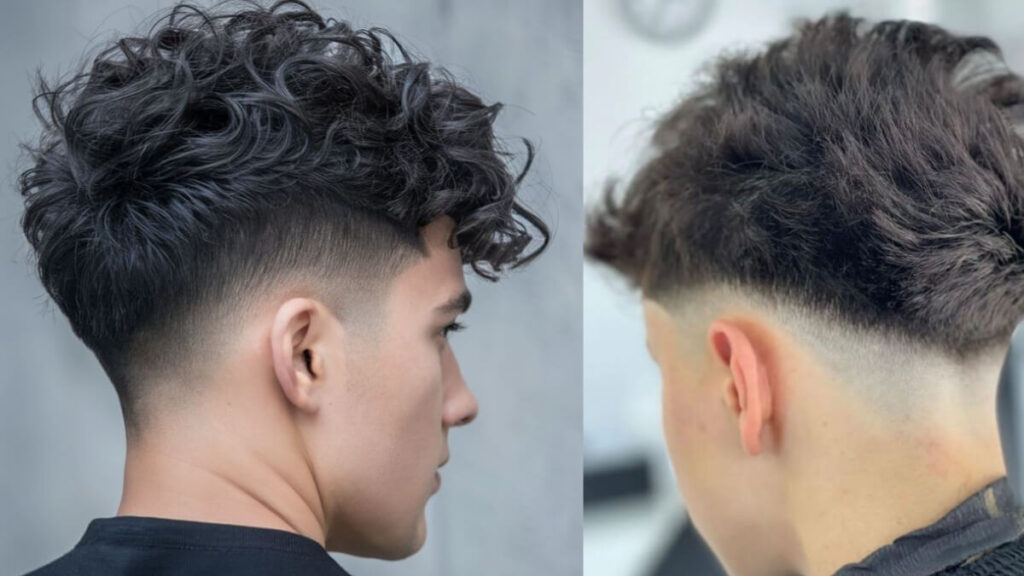
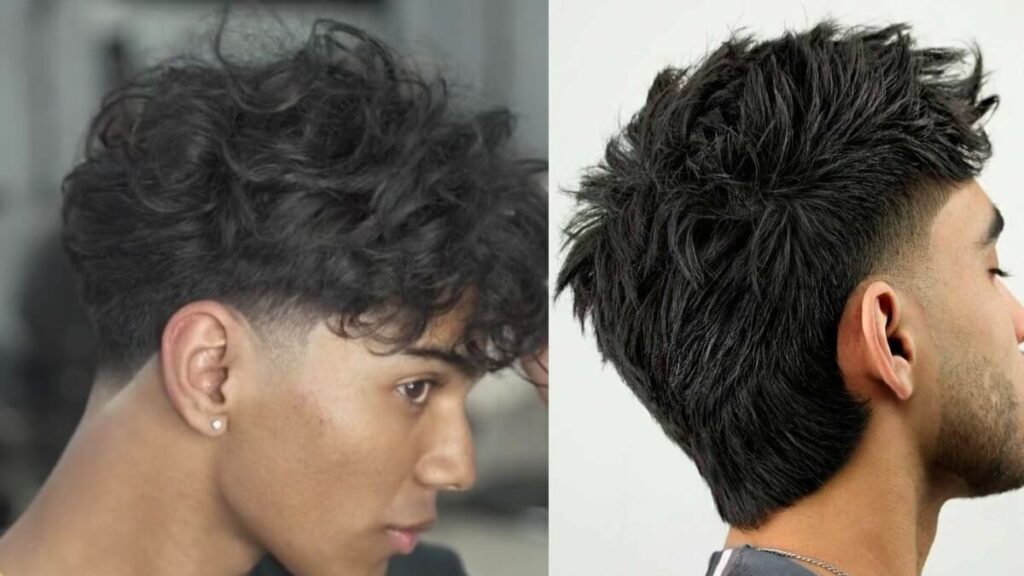
One of the standout features of the low taper fade is its versatility. Whether you have straight, curly, wavy, or coily hair, this style can be adapted to suit your natural texture. For example, men with straight hair can achieve a sleek, shiny finish, while those with curly or coily hair can celebrate their natural texture by pairing the fade with defined curls on top.
3. Low Maintenance with Proper Care
With regular touch-ups and proper care, the low taper fade is relatively easy to maintain. Once you’ve mastered the technique, you can keep your fade looking fresh and sharp with minimal effort. This makes it an excellent choice for busy individuals who want a stylish yet practical haircut.
4. Cost-Effective Solution
Visiting a barber every few weeks can add up, especially if you’re maintaining a fade that requires frequent touch-ups. By learning how to achieve a low taper fade at home, you can save both time and money while still enjoying a professional-quality haircut.
Now that we’ve covered the benefits of the low taper fade, let’s move on to the step-by-step process of achieving this stylish haircut in the comfort of your home.
Step 1: Gather the Right Tools and Products
Having the correct tools and products is crucial for achieving a professional-looking low taper fade. Without the right equipment, you risk uneven lines, harsh transitions, and an overall messy appearance. Here’s a detailed breakdown of what you’ll need:
Essential Tools:
- Clippers with Adjustable Guards:
The cornerstone of any successful fade is a high-quality pair of clippers. Look for brands like Wahl Professional or Andis , which are trusted by barbers worldwide. These clippers come with multiple guard sizes, allowing you to adjust the length of your hair as you work your way down the sides and back. - Fine-Tooth Comb:
A fine-tooth comb is essential for sectioning your hair and guiding your clippers. It helps ensure even cuts and smooth transitions between different lengths. - Scissors:
While clippers handle the bulk of the work, scissors are necessary for trimming stray hairs and refining the top section. A small pair of scissors with sharp blades is ideal for precision work. - Razor or Trimmer:
A razor or trimmer is used for cleaning up edges around the neckline, sideburns, and ears. This step adds a polished finish to your haircut and ensures everything looks neat and tidy. - Mirrors:
To achieve a flawless fade, you’ll need a handheld mirror or wall-mounted mirror to see the back of your head. This is especially important when blending the transition between the longer hair on top and the faded sides.
Recommended Products:
- Pre-Shave Oil:
If you’re doing a skin fade or close-cropped sides, pre-shave oil helps protect your skin from irritation and reduces the risk of razor burn. - Aftershave Balm:
After shaving or trimming, apply a soothing aftershave balm to prevent redness and discomfort. Look for products with ingredients like aloe vera or chamomile, which are known for their calming properties. - Leave-In Conditioner:
To keep your hair hydrated and healthy, use a lightweight leave-in conditioner after washing. This is especially important if you’ve opted for a skin fade or close-cropped sides, as the exposed skin on your scalp requires extra care. - Edge Control Gel:
Edge control gel is essential for smoothing down flyaways and creating a polished finish around your hairline. This product helps define your edges and ensures your fade looks sharp and well-groomed.
Tip: Invest in quality tools, as they provide better results and last longer than cheaper alternatives. While it may seem like a significant upfront cost, durable tools will save you money in the long run.
Step 2: Prepare Your Hair and Workspace

Proper preparation is key to achieving a flawless low taper fade. This involves not only washing and drying your hair but also setting up your workspace for maximum efficiency. Let’s break down each aspect in detail:
1. Wash and Dry Your Hair
Start by washing your hair with a lightweight shampoo and conditioner to remove dirt, oil, and product buildup. Clean hair ensures a smooth cutting process and helps you see the natural growth pattern of your hair. Avoid using heavy conditioners that weigh down your hair, as this can make it difficult to achieve precise cuts.
Once washed, dry your hair thoroughly using a towel or blow dryer. Avoid rubbing too aggressively, as this can cause frizz or damage. Instead, gently pat your hair dry with a towel and use a blow dryer on a low heat setting to avoid excessive heat exposure.
2. Set Up Your Workspace
Choose a well-lit area with access to mirrors. Natural light is ideal, but if you’re working in a dimly lit space, consider using a ring light or desk lamp to illuminate your workspace. Place a towel around your shoulders to catch loose hair and make cleanup easier. Ensure your tools are within reach, and have a trash bin nearby for disposal.
Additional Tip: If you’re working alone, use a handheld mirror to check the back of your head. You can also record yourself during the process to review your work and make adjustments as needed.
Step 3: Section Your Hair
Sectioning your hair is essential for achieving an even fade. Without proper sectioning, you risk uneven cuts and harsh transitions. Use a fine-tooth comb to divide your hair into three sections:
- Top Section:
Secure the top section out of the way using hair clips or rubber bands. This allows you to focus on the sides and back first, ensuring a smooth and even fade. - Sides:
Focus on the sides first, as they form the foundation of the fade. Start with damp hair for better control, but ensure it’s not soaking wet, as this can affect the clipper’s performance. - Back:
Save the back for last, as it requires careful attention to detail. Use a handheld mirror to check your work and ensure the fade blends seamlessly into the top section.
Tip: Take your time during this step, as proper sectioning sets the stage for a flawless fade.
Step 4: Start with the Higher Guard
Begin with a higher guard (e.g., #3 or #4) on your clippers to leave some length on the sides and back. This acts as a safety net for beginners, allowing you to gradually work your way down to shorter lengths. Move the clippers upward in small, overlapping strokes to ensure an even cut. Take your time during this step, as it sets the foundation for the rest of the fade.
Key Point: Always move the clippers against the grain of your hair for a closer cut. If you’re unsure about the direction of your hair growth, use a fine-tooth comb to lift the hair slightly and identify the natural pattern.
Step 5: Gradually Lower the Guard
Once you’ve used the higher guard to create the initial fade, switch to lower guard sizes (e.g., #1 or #0) as you move closer to the skin. This gradual transition is what creates the seamless gradient of a low taper fade . Be patient and methodical, ensuring each section blends smoothly into the next.
Tip: Blend the transition by using clippers without a guard to feather the edges between different guard lengths. This step is crucial for avoiding harsh lines and ensuring a natural-looking fade.
Step 6: Blend the Transition

Blending is arguably the most important step in achieving a flawless low taper fade . Use clippers without a guard to carefully blend the transition between the longer hair on top and the faded sides. Move the clippers upward in small, overlapping strokes to ensure a smooth gradient. Avoid rushing this step, as it’s crucial for avoiding harsh lines.
If you’re doing it yourself, use a mirror to check the back and sides for consistency. For beginners, it’s always a good idea to start slow and make gradual adjustments.
Pro Tip: Use a fine-tooth comb to lift the hair slightly while blending for better visibility and precision.
Step 7: Clean Up the Edges
Once the fade is complete, use a razor or trimmer to clean up the edges around the neckline, sideburns, and ears. This step adds a polished finish to your haircut and ensures everything looks neat and tidy. Be careful not to over-shave, as this can irritate the skin.
Additional Tip: Apply a soothing aftershave balm or moisturizer to prevent redness and discomfort.
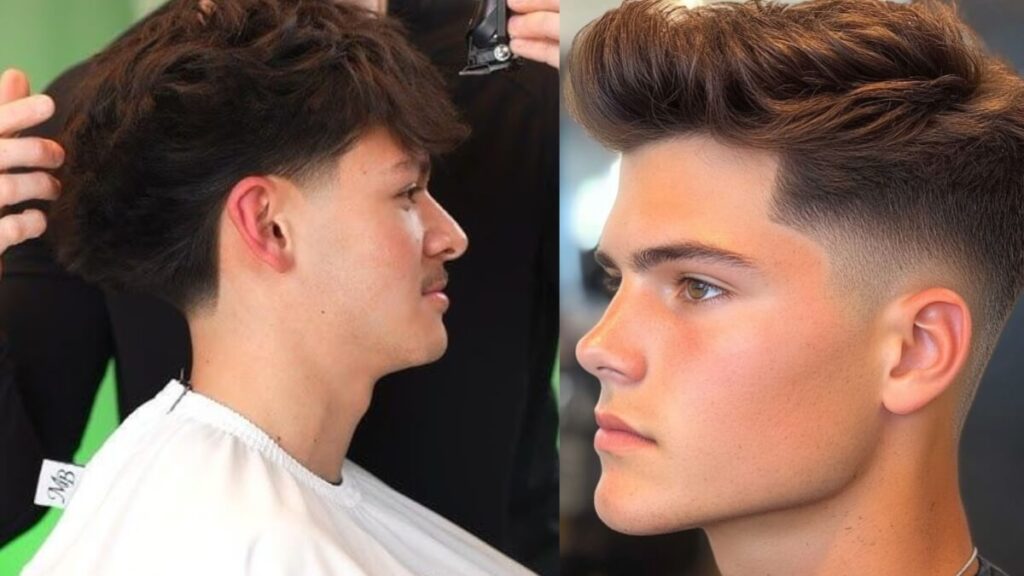
Step 8: Style the Top Section
The top section of your hair is where you can truly express your personality and adapt the style to different scenarios. Here are three styling variations:
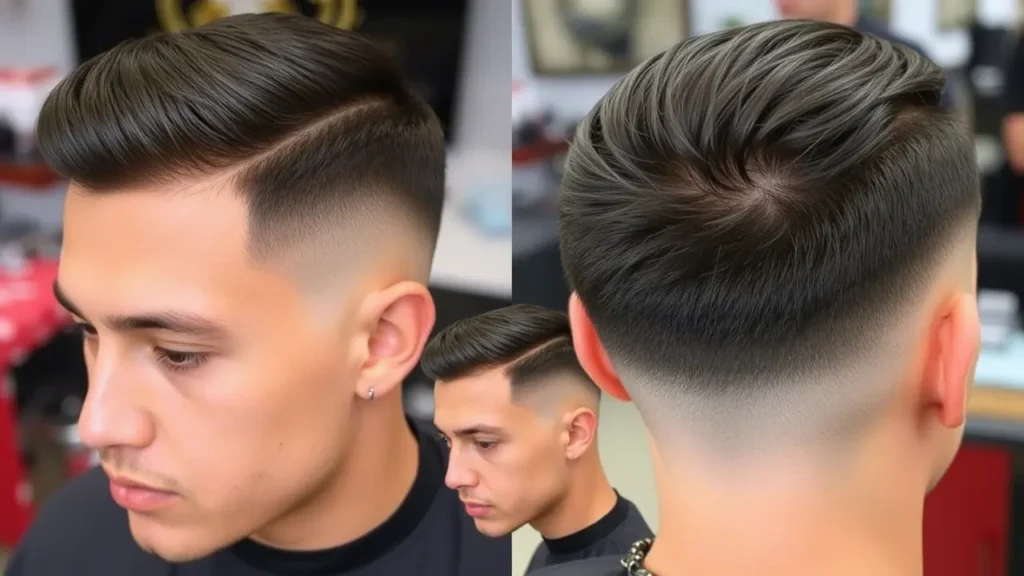
- Slicked-Back Style: Use a lightweight pomade to comb the hair back for a sleek, professional appearance.
- Messy Textured Look: Apply a texturizing spray and tousle the hair with your fingers for a laid-back vibe.
- Spiked or Edgy Style: Use a strong-hold gel or wax to spike the hair upward for a bold, modern look.
Product Recommendation: Try Suavecito Pomade for a strong hold and shiny finish or Bumble and Bumble Surf Spray for a textured, tousled look.
Step 9: Maintain Your Low Taper Fade

To keep your fade looking fresh, follow these maintenance tips:
- Regular Touch-Ups: Trim the sides and back every 2-4 weeks to maintain the fade.
- Moisturize Your Scalp: Use a lightweight leave-in conditioner or scalp oil to keep your scalp healthy.
- Protect from Heat Damage: If you use styling tools, always apply a heat protectant spray beforehand.
Conclusion
Achieving a low taper fade at home may seem challenging at first, but with the right tools, techniques, and patience, you can create a salon-quality haircut in the comfort of your home. By following this step-by-step guide, you’ll not only save time and money but also gain confidence in your grooming abilities. Remember to maintain your fade regularly and experiment with different styles to find what works best for you. So, grab your clippers and get started—your perfect low taper fade awaits!
Also Read
What is a Low Taper Fade? The Ultimate Guide to This Classic Cut
Top Low Taper Fade Styles for Men: 2025’s Hottest Haircut Ideas


Pingback: Low Taper Fade vs Other Fades What’s the Difference? - Low Taper Fade
Pingback: Low Taper Fade Curly Hair with Beard: The Ultimate Style Guide 2025 - Low Taper Fade
Pingback: Low Taper Fade with Volume on Top: Tips, Tricks, and Styling Ideas - Low Taper Fade